PYBLOCKS / DOCS
Animation
Animate objects with keyframes and sprite frames in the Animate workspace, then play the clips from blocks. For quick one-off movements, use tweens.
#The Animate workspace
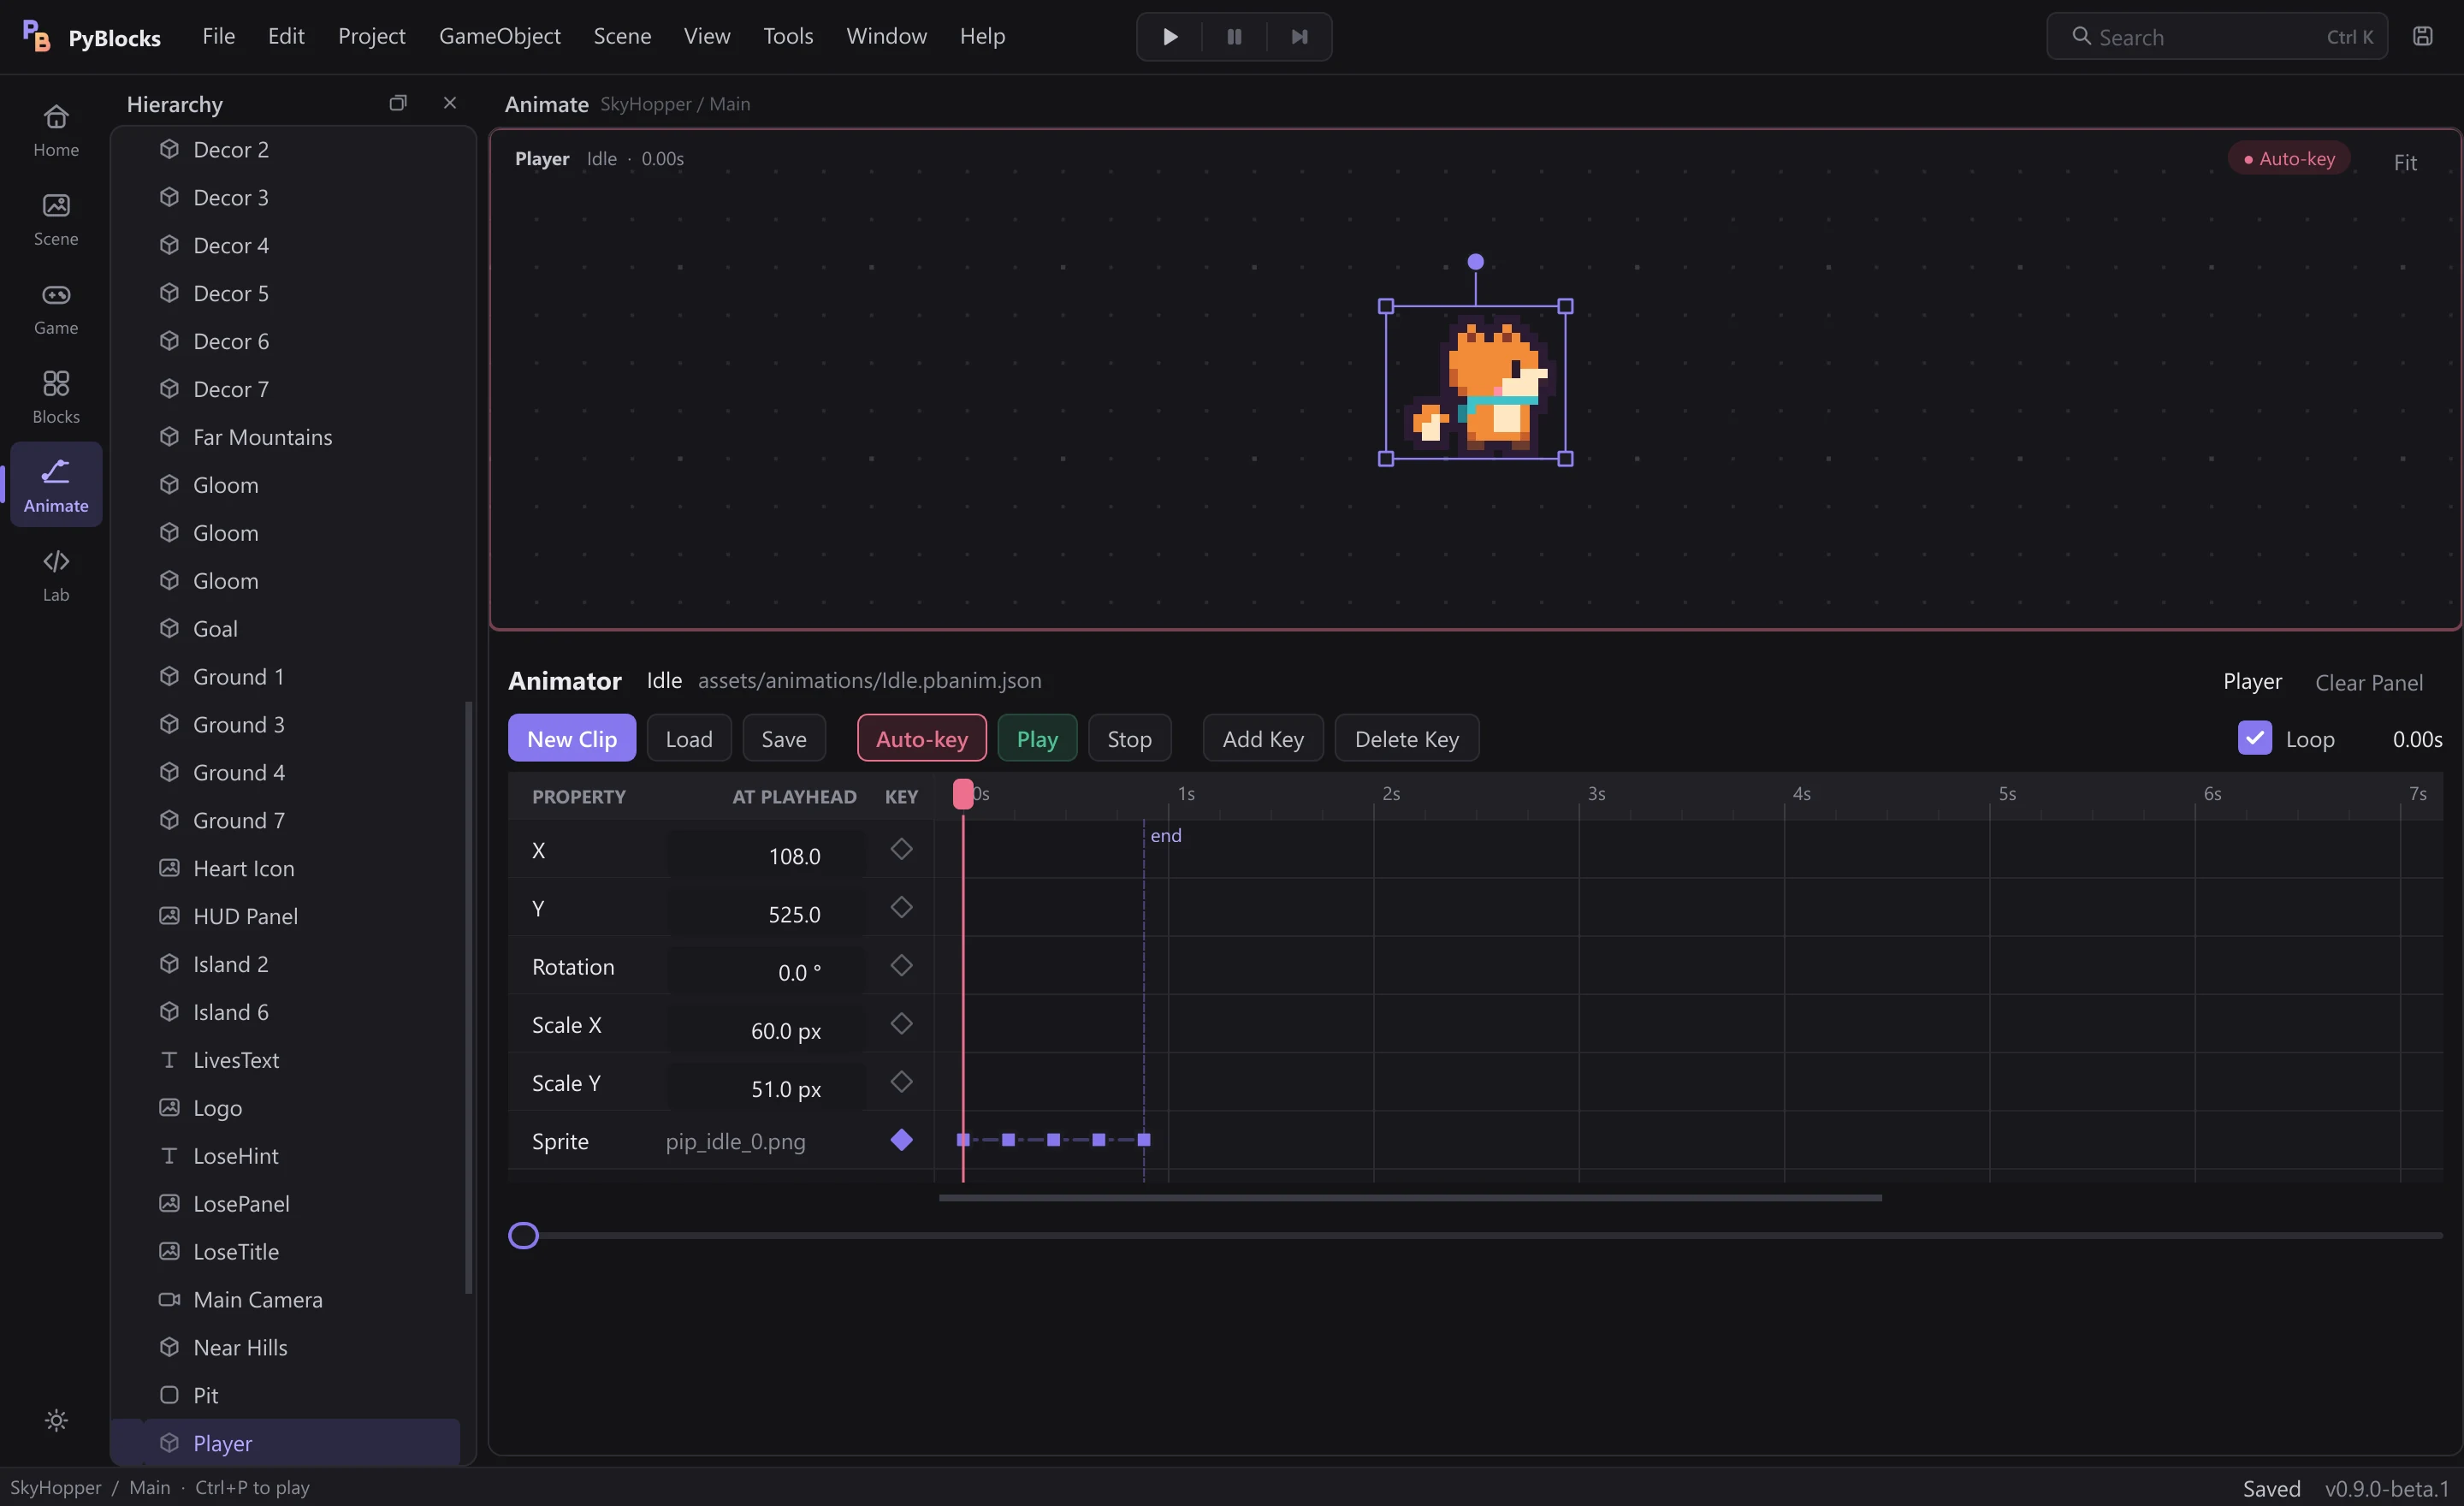
Open Animate (Ctrl+5) with a project open and select an object in the Hierarchy; the Open Animator button in the Inspector's Animator group does the same. The workspace has two parts:
- The stage (top) previews the object at the playhead. Drag the object, a corner or the round knob to move, resize or rotate it.
Fit(or the F key, or a double-click on empty space) frames the object and its motion path. - The Animator (bottom): the clip toolbar, the property strip (
PROPERTY,AT PLAYHEAD,KEY) and the timeline with one row per track.
While Animate is active, Ctrl+Z and Ctrl+Y undo and redo animation edits: adding, moving and deleting keys, easing, loop, typed values, and a whole stage drag as one step. Each clip keeps its own history.
#Clips
A clip is one named animation, such as Idle, Walk or Jump, saved as a .pbanim.json file. An object can use several clips.
New Clipasks for a name and creates the clip in the project'sAnimationsfolder.Loadopens an existing.pbanim.jsonfile (the examples keep theirs inassets/animations) and attaches it to the object.- Clips save automatically shortly after every change.
Savesaves right away. Loopdecides whether the clip repeats. Its length is the time of its last key.- The Inspector's
Clipfield shows the object's current clip;Clear Animationdetaches all clips from the object.
A clip file is plain JSON with a list of keyframes:
{
  "name": "OrbPulse",
  "kind": "animation",
  "loop": true,
  "length": 0.48,
  "keyframes": [
    { "track": "Sprite", "time": 0.0, "value_type": "sprite",
      "source_mode": "image", "sprite_asset_path": "assets/sprites/orb_0.png" },
    ...
  ]
}#Keyframe properties
You do not need any sprites to animate: position, rotation and size can be animated on any object, including a plain square.
XandY(the Position X and Position Y tracks): where the object is, in pixels. These values are absolute, so the clip moves the object to those exact coordinates.Rotation: degrees, clockwise.Scale XandScale Y: width and height in pixels.
- Create a clip with
New Clip. - Move the playhead: click or drag in the time ruler of the timeline.
- With
Auto-keyon (the default), drag the object on the stage or type a value in the property strip. A key is added at the playhead. - Move the playhead to another time and change the object again.
- Press
Playto preview the clip andStopto go back to the start.
The diamond next to each property shows its state: filled means there is a key at the playhead, outlined means the property is animated elsewhere. Click it to add or remove a key. With Auto-key off, changes stay pending (a highlighted diamond) until you click the diamond.
Add Key keys the selected track (or every transform track if none is selected), and Delete Key (or Del) removes the selected key. Drag a key along its row to change its time. Keys snap to 0.01 s steps.
Easing: right-click a key and choose how the value travels to the next key: Linear, Ease in, Ease out, Ease in-out or Step (hold).
#Sprite frames
The Sprite track swaps the object's image over time, for flip-book animations such as walking or a spinning coin.
- Select the
Spriterow, move the playhead and clickAdd Key(or click theSpritediamond). - Choose the source:
Imageto pick any image inside the project, orTileto pick a slice of the object's sprite sheet. - Repeat at the next times, for example every 0.10 s.
#Play clips from blocks
When the game starts, each object plays its current clip automatically. Use the Animation blocks to choose what plays:
- Play Animation switches to another of the object's clips. Its list shows the clips attached to the selected object.
- Play Animation And Wait plays a clip once and continues the script when it ends. On Animation Finished is an event for the same moment.
- Stop Animation, Pause Animation, Resume Animation, Set Animation Speed, Set animation loop and Seek animation control playback.
- Play animation named {…} takes the clip name from a template, for example
walk_{dir}.
Move with WASD / arrows plays clips named Walk and Idle automatically while the object moves or stands still.
#Tweens
For a quick movement that does not need a clip, use Animate property to. It smoothly changes x, y, rotation_degrees, width, height or opacity to a target value over a duration, with linear, smooth or ease_out easing.
A tween runs in the background: the script continues immediately. Starting a new tween on the same property replaces the old one, and Stop property animations stops all of the object's tweens. Add a Wait with the same duration if the script should wait for it.